- Home
- Screw timing indicator digital M2,5×10 mm
Categories
- Accessories (583)
- Air & Oil Filters (269)
- Axle & Shaft & Camshaft (61)
- Bearings & Gaskets & Washers (1582)
- Belt (397)
- Body (562)
- Bolt & Nut & Screw & Adaptor (1173)
- Brakes (403)
- Bushing (2)
- Cable (413)
- Carburetor (648)
- CDI & Ignition & Spark plug & Solenoid (281)
- Chain (16)
- Charger (22)
- Clutch (742)
- Covers & Caps (308)
- Cylinder (954)
- Engine (114)
- Exhaust (930)
- Fender & Mudguard (134)
- Frame (26)
- Fuel pump & tank & accessories (210)
- Gear & Gear Cog (210)
- Handlebar & Throttle grip (790)
- Headlight (345)
- Luggage Carrier (184)
- Mirrors (108)
- Mouting plate & Floor board & Side panel (99)
- Pedal & Kickstart (165)
- Regulator (73)
- Repair Kit (44)
- Seat Belt (3)
- Seats & Covers (258)
- Spares (1)
- Speedometer (89)
- Spring (323)
- Sprocket (14)
- Starter (87)
- Steering (58)
- Suspension (696)
- Switch (174)
- Tools (498)
- Wheels and Tires and rim (641)
- Windshields (80)
- Wiring Kit (37)
Product tags
Screw timing indicator digital M2,5×10 mm
SPREAD THE LOVE
Description
Product description
A correctly set up ignition timing is essential for any tuned motor. This factor often separates the wheat from the chaff. The timing indicator digital is a very practical tool that no well-equipped workshop should be without. The exact timing indicator digital allows an optimal set up of the motors point of ignition. It can be used on both two and four stroke motors, no matter whether from a vintage Vespa or Lambretta, or 50-180cc two and four stroke automatic scooters.
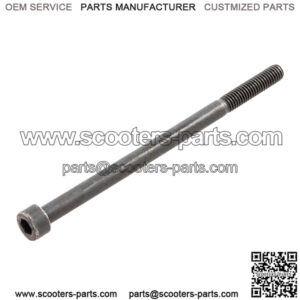
To facilitate a simple and exact positioning of the timing degree indicator our 2.0 timing degree disc is provided with three holes to accept the long fixing bolts (#83002410). This allows all regular degree discs to be mounted by simply drilling three holes in the battery compartment, making reading the timings even simpler.
Conclusion:
A must-have tool, for all dedicated grease monkeys!
SIP – TIP: Do not forget to order a new spark plug. A strobe lamp is also necessary, along with a set of fixing bolts (#83002410). You need 2 x AAA Type Batterys.
Directions for use:
Find the top dead centre (TDC)
Mark the position shown by the indicator on the cooling fins
Set the timing indicator to zero
Desired ignition point (anti-clockwise) should then also be marked on the engine casings (for example 18
before TDC for the MALOSSI 211cc cylinder)
Remove the timing indicator, start the engine and check with the strobe lamp if the arrow lines up with the marking on the casings. If not, rotate the stator plate without forgetting to mark its original position for future reference when rebuilding
OEM numbers (for comparisons):
(PINASCO)
Related products
-
Bolt & Nut & Screw & Adaptor
Screw air filter box M6x50 mm, cross recess, raised head, PIAGGIO
-
Bolt & Nut & Screw & Adaptor
Screw air filter box M6x55 mm, hexagonal with flange, PIAGGIO
-
Bolt & Nut & Screw & Adaptor
Screw air filter box M6x100 mm, PIAGGIO
-
Bolt & Nut & Screw & Adaptor
Air Adjusting Screw (CVK Carb) GY6


